


Hey dude 👋 , Hope you are good and coding the masterpiece of your work. In this tutorial I'm going to talk about deployment of Laravel Project on C-Panel in a secure way.
Note :- I never recommend to move the content of public folder into root directory and make changes to index.php because I think it makes our project unsecure.
Requirements
- Check server requirements on the Laravel Official Website according to Laravel Project Version.
There is very simple procedure to deploy. Just follow it 👇
Deployment Process
1. Zip/Compress Your Project Folder
Before uploading it on server you should ensure that you have compressed your projects file in a zip folder. You can upload your entire files without compressing but It'll take a lot of time. So compressing the files then sharing to host is recommended.
2. Extract Database
I assume you have stored database(mysql) in php-my-admin. Go to phpmyadmin panel and export your project database. If you are using other database, just export and download in your possible ways.
Now, you have two things - Project's Zip folder & Database file.
3. Upload it on C-Panel
1. Zip file ->
- Go to c-panel of your hosting server and open file manager.
- In file manager open public_html directory or public_html>{addon domain dir} where you want to host files.
- You must ensure it to keep as empty folder.
- Now, using built-in FTP upload function, Upload your local computer zip file and extract it.
_ If your file are extracted in your domain root directory then it is okay otherwise move all the files in root domain.

2. Database ->
- Go to c-panel and create a database for your project to store the data.
- After creating database go to phpmyadmin of cpanel import the database file from your local computer.
- Once it's done, check your assigned database name, user name, password and host server. You will find it in 'MySQL® Databases' section
4. Project file modification
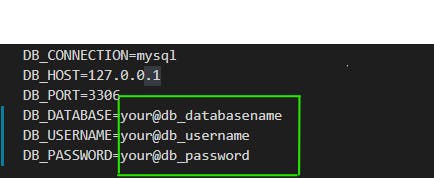
1) .env file -> Open file manager of c-panel in new tab and in the root folder of your project update your env file with correct information of your database.
2) .htaccess-> In this article, this is most important part of deployment process. Most persons say that move your Public folder's file in root directory and make changes to index.php but it will expose your secret files of the project.
- Keep your files at the same place as it was in your local environment
- Create a .htacess file in the root directory to redirect/map it with the public folder.
- Copy and paste the below code
<IfModule mod_rewrite.c> <IfModule mod_negotiation.c> Options -MultiViews </IfModule> RewriteEngine On RewriteCond %{REQUEST_FILENAME} -d [OR] RewriteCond %{REQUEST_FILENAME} -f RewriteRule ^ ^$1 [N] RewriteCond %{REQUEST_URI} (\.\w+$) [NC] RewriteRule ^(.*)$ public/$1 RewriteCond %{REQUEST_FILENAME} !-d RewriteCond %{REQUEST_FILENAME} !-f RewriteRule ^ server.php - It's done, just save it and open your domain URL in the browser.
Conclusion -
🔥🔥 Just after doing these simple things, I wish your project should be deployed successfully. If you face any problem in the deployment or other things related to Laravel. Just drop your comment below.